
How to Hang Wallpaper on a Wall: A Complete Step-by-Step Guide
To hang wallpaper, start by preparing the wall, making sure it is clean, smooth and dry. Draw a vertical guideline, apply the adhesive to the wall or the wallpaper, position the first panel from the top with an extra 5 cm of material, smooth out any air bubbles with a wallpaper smoother working from the centre towards the edges, and trim the excess along the bottom and around the corners. Wallpapering a standard 3 x 3 metre wall usually takes between 2 and 4 hours as a DIY project.
This guide covers everything you need to know to hang wallpaper with confidence: from choosing the right tools and preparing the wall to calculating the number of rolls, handling corners and working with different types of wallpaper, including traditional, peel-and-stick and custom photo wallpaper. Whether you are updating a living room, bedroom or commercial space, following the correct steps in the right order can make all the difference between a professional-looking finish and an amateur one.
What You Need to Hang Wallpaper
Having the right tools ready before you begin is the first rule of successful wallpaper installation. Improvising with unsuitable equipment is one of the most common mistakes made by first-time decorators. Even high-quality wallpaper will not look its best if the preparation is rushed, resulting in crooked seams, trapped air bubbles and poorly finished edges.
Putting together your wallpapering kit in advance takes only a few minutes, but it will save you from inconvenient interruptions once the work is underway. There is nothing worse than realising that you have forgotten your utility knife just as the first panel is on the wall and the adhesive is beginning to dry around the edges.
Essential Wallpapering Tools
For a neat, professional-looking installation, make sure you have the following tools before you begin:
- Plumb line or laser level - for drawing a vertical guideline on the wall, which is essential for keeping the panels perfectly straight
- Tape measure and pencil - for measuring and marking the position of each panel on the wall
- Plastic wallpaper smoother - for pressing the wallpaper into place and removing air bubbles
- Sharp utility knife or craft knife - essential for trimming the top and bottom edges and cutting around obstacles
- Wallpaper seam roller - for sealing the joins between panels with even pressure
- Wide brush or medium-pile roller - for applying an even layer of adhesive to the wall
- Bucket and sponge - for preparing the adhesive and immediately wiping away any excess
- Scissors - for cutting the panels to approximate size before installation
- Stable stepladder or work platform - for reaching the upper part of the wall safely and comfortably
Keeping these tools within easy reach, ideally arranged on a work surface close to the wall, turns a potentially frustrating job into a smooth and satisfying process. Most of them are readily available from hardware shops and the DIY departments of larger home improvement stores.
How to Choose the Right Wallpaper Adhesive
The right adhesive depends primarily on the type of wallpaper you are installing. Wallpaper adhesives are not all the same, and using the wrong product may lead to early peeling, visible stains or damage to the surface underneath.
Lightweight wallpapers, such as traditional paper and non-woven wallpaper, generally use a methylcellulose-based adhesive supplied as a powder and mixed with water according to the manufacturer's instructions. For vinyl or heavier wallpapers, a thicker and stronger ready-mixed adhesive is usually preferable, as it provides more reliable adhesion over time.
For custom 3D photo wallpaper, the ideal type of adhesive will be specified in the product's technical information. Following these recommendations ensures the best possible adhesion while protecting the material. A practical tip is to prepare the adhesive at least 10 minutes before installation and mix it thoroughly to prevent lumps. If you are working over several sessions, keep the adhesive in a sealed container in a cool place to slow down drying.
How to Prepare a Wall Before Hanging Wallpaper
Wall preparation is the most underestimated stage of the entire process, yet it is what separates a professional-looking result from an amateur one. An improperly prepared wall is the main cause of peeling, permanent air bubbles and seams that begin to open only a few months after installation.
The surface must be clean, smooth and dry, with no signs of damp, mould or flaking paint. Any visible imperfections, including holes, cracks and uneven areas, must be repaired before installation begins. Wallpaper cannot effectively disguise a badly prepared wall; those imperfections will nearly always show through in the finished result.
If the wall has been painted with glossy enamel paint, lightly sand the surface to create enough texture for the adhesive to grip. An overly smooth surface will not hold the adhesive or wallpaper securely, especially during the first few hours after installation.
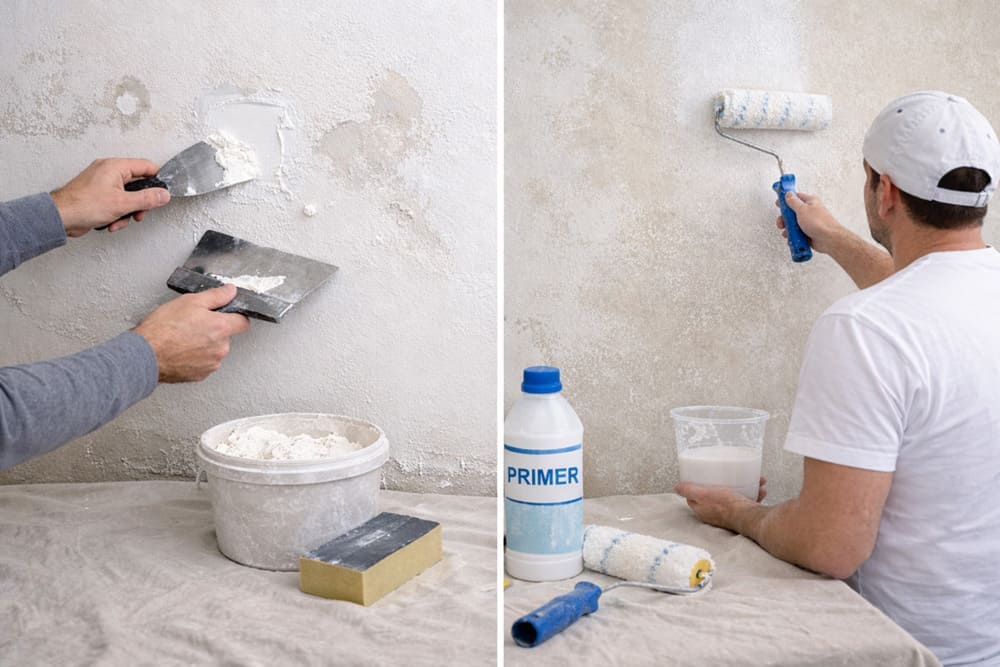
How to Deal with Cracks or Damp Walls
If the wall has small cracks or holes, the repair process is straightforward. Fill the imperfections with a suitable acrylic filler, allow it to dry completely, usually for 12-24 hours, and then sand the area until it feels level and smooth. Deep or recurring cracks may indicate an underlying structural problem, so it is worth asking a professional to assess them before proceeding with the wallpaper installation.
Damp is a more serious issue and requires a different approach. Before wallpapering, make sure the wall is completely dry. Yellowish stains, blistering paint or a musty smell are clear signs of an ongoing moisture problem. Identify and resolve the source first; otherwise, the wallpaper may begin to peel away within a matter of weeks.
Walls that have previously been affected by damp should be treated with a suitable anti-mould product and allowed to dry completely, potentially for several days, before installation begins. Applying wallpaper to a wall that is still damp can permanently damage both the wall covering and the health of the indoor environment.
When to Apply a Primer or Wall Sealer
Porous walls, such as sand-finished surfaces, untreated plasterboard or walls painted in very deep, saturated colours, should be treated with a primer or wall sealer before wallpaper is installed. Primer serves two important purposes: it seals the porous surface so that it does not absorb the adhesive too quickly, and it creates an even base that improves the adhesion of the wallpaper.
Apply the sealer evenly across the entire area with a brush or roller, then leave it to dry for at least 2-4 hours before hanging the wallpaper. If the wall is painted in a very dark or vivid colour, consider applying a coat of matt white paint before priming. This will prevent the underlying colour from showing through, particularly when installing wallpaper with a white background or other pale shades.
How to Calculate How Many Rolls of Wallpaper You Need
Calculating the correct amount of material is an essential step that is often overlooked. This can have frustrating consequences: you may run out of wallpaper halfway through the job or buy far more than you actually need. The real difficulty arises when you order an extra roll several weeks later and discover that the same print batch is no longer available, resulting in noticeable colour differences between the original and replacement rolls.
A useful rule of thumb is to buy one extra roll beyond the calculated amount and keep it for possible future repairs. It is a relatively small additional cost that can save you from a much more difficult situation later.
Calculating Wallpaper for a Standard Wall or Room
For standard wallpaper rolls measuring 53 cm wide and 10.05 m long, you can use the following calculation:
- Measure the total perimeter of the room in linear metres by adding together the lengths of all the walls you intend to wallpaper
- Divide the perimeter by the width of the roll (0.53 m) to calculate the number of drops required
- Multiply the number of drops by the height of the room, adding 10 cm for trimming (for example, 2.80 m + 0.10 m = 2.90 m)
- Divide the resulting total by the length of the roll (10.05 m)
- Always round the figure up and add one spare roll
For example, consider a room with a perimeter of 14 m and a ceiling height of 2.80 m. Dividing 14 by 0.53 gives approximately 26 drops. Multiplying 26 by 2.90 gives 75.4 linear metres. Dividing 75.4 by 10.05 gives 7.5, so you will need 9 rolls in total: 8 after rounding up, plus 1 spare roll.
With custom photo wallpaper, such as the designs available from 3dwallpaperdecor.com, the calculation is entirely different because the wallpaper is made to the exact dimensions of your wall. You simply provide the measurements and receive numbered, pre-cut panels that are ready to install without unnecessary material waste.
How to Allow for the Pattern Repeat
If your wallpaper features a repeating geometric or decorative design, you must also account for the pattern repeat: the vertical distance from one repetition of the design to the next. This measurement is always shown on the packaging or in the product's technical information.
If the pattern repeat is 64 cm and the wall is 2.80 m high, each drop needs additional material to ensure the design lines up correctly. In this example, each usable drop requires approximately 3.44 m of wallpaper (2.80 + 0.64 = 3.44), reducing the number of drops you can cut from each roll. A large pattern repeat may mean that you need 20-30% more material than the basic calculation suggests.
Non-repeating photo wallpapers, including made-to-measure wall murals, eliminate this problem entirely. Each panel forms a unique part of the overall image and does not require a repeating design to be matched, greatly simplifying installation and reducing material waste.
How to Hang Wallpaper Step by Step
At this stage, the wall should be properly prepared, your tools should be ready and the amount of material should have been calculated accurately. It is now time to begin the installation itself. Following the correct order is essential because every stage builds on the one before it, and skipping even a single step can compromise the final result.
Always work in a well-ventilated room, but avoid direct draughts. Moving air can cause the adhesive to dry unevenly, making the edges lift before you have finished smoothing the panel. Keep the heating switched off during installation as well, since excessive heat can have the same unwanted effect.
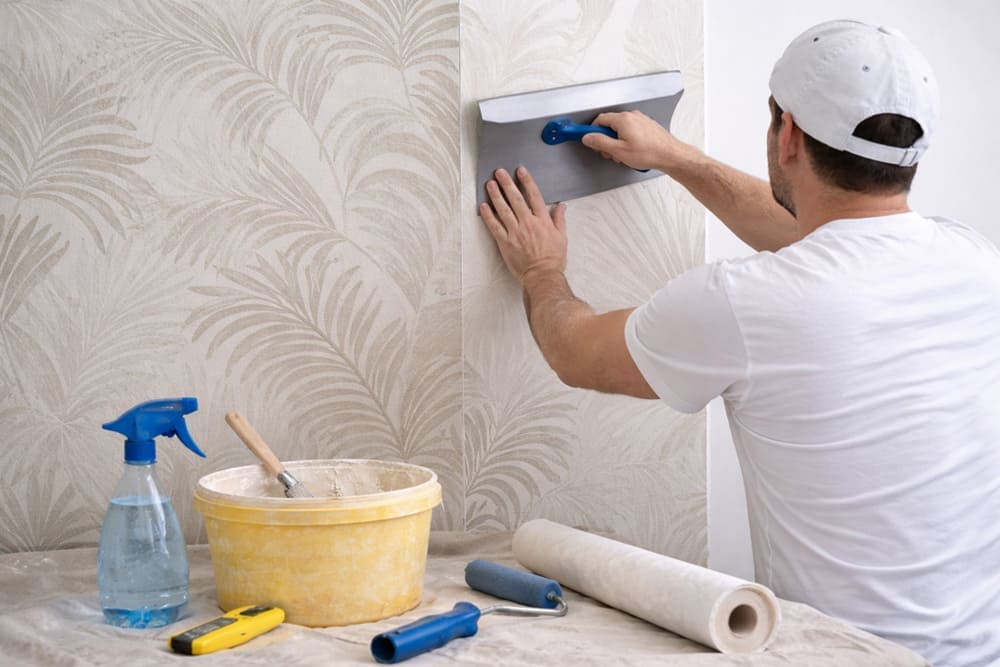
Step 1 - Draw a Vertical Guideline
The first stage is also the most critical: drawing a perfectly vertical line to guide the first panel. Never assume that the corner of the room is straight. Corners are rarely perfectly vertical, and starting from one without using a plumb line will almost inevitably make the panels drift out of alignment and gradually fan out as you work across the wall.
Use a plumb line or laser level to draw a vertical guideline at a distance from the corner equal to the width of the panel minus 1-2 cm. This small allowance lets the first panel wrap slightly around the corner and maintains continuity between the walls. Mark the line with short, light pencil dashes rather than a heavy continuous line, which might remain visible through the wallpaper.
Step 2 - Prepare and Apply the Adhesive
Apply the adhesive to the wall with a wide brush or medium-pile roller, covering an area equal to the width of one panel plus a few centimetres on either side. Do not apply adhesive to the entire wall in advance. Work one panel at a time, as the adhesive dries quickly and a partially dried surface will not provide the same level of adhesion as a freshly pasted one.
With traditional paper wallpaper, the usual method is to paste the back of the wallpaper and fold it loosely in a concertina or “booked” position for 5-10 minutes before hanging. This allows the paper to absorb the adhesive evenly and helps prevent distortion. With vinyl or non-woven wallpaper, the adhesive is generally applied directly to the wall without pre-pasting the panel.
Spread the adhesive evenly, first using vertical strokes and then horizontal ones, making sure that no areas are left uncovered. Avoid applying excessive amounts, particularly near the edges of the pasted area.
Step 3 - Hang the First Panel
Position the first panel from the top, leaving approximately 5 cm of excess above the ceiling line or ceiling moulding. Align the vertical edge of the panel with the guideline you drew earlier, checking that it hangs straight along its entire length.
Do not press it firmly into place straight away. Rest the panel gently against the fresh adhesive and check the alignment before continuing. Fresh adhesive gives you a short window in which the panel can be lifted and repositioned without damage, but this usually lasts only a few minutes. Once you are happy with the alignment, smooth the wallpaper from the centre towards the edges using a plastic wallpaper smoother and firm downward strokes.
Step 4 - Align the Seams and Remove Air Bubbles
Position the second panel directly against the first. The edges should meet neatly without visible overlap or gaps between them. Use a rubber seam roller to seal the join, working vertically from top to bottom and applying firm but not excessive pressure.
To remove air bubbles, use the flat smoother to work from the centre of the panel towards the edges with controlled, decisive strokes. Small bubbles often disappear naturally during the first 24-48 hours as the wallpaper dries, so there is no need to panic if you notice a few immediately after installation. Bubbles that remain after 48 hours usually indicate an area where the adhesive has not bonded properly and may need to be treated using a wallpaper adhesive syringe.
Immediately wipe away any adhesive that escapes from the edges or seams with a damp sponge and warm water. Once it has dried, adhesive is much harder to remove without leaving visible marks on the wallpaper surface.
Step 5 - Trim the Edges and Complete the Final Finish
Once all the panels have been hung, it is time to finish the edges. Use the flat smoother as a cutting guide and a utility knife fitted with a fresh blade to trim the excess at the top, along the ceiling or moulding, and at the bottom, along the skirting board. A worn blade tends to tear rather than cut, and this simple detail can make a noticeable difference to the quality of the finish.
Make each cut in one smooth, continuous movement rather than stopping halfway, as this helps prevent uneven finished edges. After trimming, wipe the entire surface once more with a damp sponge to remove any remaining adhesive. Allow the wallpaper to dry for at least 24 hours at normal room temperature, avoiding draughts and keeping the heating switched off.
How to Hang Peel-and-Stick Wallpaper
Self-adhesive wallpaper, commonly known as peel-and-stick wallpaper, is a category of its own. It has become popular because it is relatively easy to apply and can often be removed or repositioned without damaging the wall underneath. It can be a practical choice for rented homes, temporary room updates or anyone who wants to experiment with a bold design while keeping the option to change it later.
Installation is noticeably simpler than with traditional wallpaper: there is no separate adhesive to prepare, no paste residue to clean and less risk of making a mess on floors or ceilings. Begin by unrolling the panel and peeling back approximately 20 cm of the protective backing from the top. Align the panel with your vertical guideline, then work gradually down the wall, removing the backing a little at a time while pressing the wallpaper into place with a smoother.
The wall still needs to be clean, smooth and dry. The self-adhesive backing will not bond properly to a surface that is dusty, greasy or uneven. If the wall is highly porous or has a rough finish, adhesion may become unreliable over time, particularly in exposed areas or rooms affected by condensation.
For those looking for a higher-quality solution that remains manageable to install while offering the appearance of premium wallpaper, the custom 3D photo wallpapers from 3dwallpaperdecor.com are made from carefully selected materials to make installation accessible even without professional experience. Every order comes with detailed hanging instructions, and the panels are numbered to make assembly straightforward.
How to Hang Wallpaper Around Corners
Corners are among the most delicate parts of any wallpaper installation. Many DIY projects begin to look less polished around corners, where uneven cuts, crooked panels or seams may start to lift after a few months. The good news is that corners can also be finished neatly with the correct method. Once you understand the technique, they can become one of the most satisfying parts of the project.
How to Handle Internal Corners
The most important rule for internal corners is never to force a full-width panel rigidly around the corner from one wall onto the next. Corners are rarely a perfect 90 degrees, and a panel wrapped in this way is likely to pull away, leaving a raised edge or an uneven crease that becomes more noticeable over time.
The correct method is to measure the distance from the last installed panel to the corner, then cut the next panel wide enough to cover that distance with an additional 1-2 cm wrapping onto the adjoining wall. On the second wall, draw a new vertical guideline and begin a new run of panels from that line, allowing the first panel to overlap the small excess from the previous wall. Press the overlap firmly with a seam roller to seal the join inside the corner.
If the corner is particularly uneven, which is common in older masonry buildings, increase the overlap to 3-4 cm. Work patiently as you press the wallpaper into the shape of the corner, using your fingers first before finishing with the smoother.
How to Handle External Corners
External corners, such as those around columns or dividing walls, require extra care because they are more exposed to everyday knocks and friction. Wrap the panel around the corner with at least 2-3 cm of excess on the adjoining side, then press it carefully into position with the smoother so that it follows the profile of the corner closely.
For a more durable finish on external corners, consider using a PVC or aluminium corner guard. This protects the wallpaper edge from wear and helps preserve a sharp, clean profile over time. On permanent installations or when using premium wallpaper, this small addition can make a significant difference to the lifespan of the wall covering.
How to Work Around Windows, Doors and Electrical Sockets
Walls are rarely completely free of obstacles. Windows, doors, electrical sockets and light switches all require accurate cutting, but with a little care these cuts will be almost invisible in the finished installation. The key is to take your time and always work with sharp tools.
Around windows and doors, hang the panel normally so that it covers the opening. Then cut into the wallpaper with scissors or a utility knife, following the shape of the frame. Make diagonal cuts from the corners towards the opening and gradually fold the wallpaper into place along the edge of the frame. Trim the excess with the utility knife, using the frame itself as a natural cutting guide.
For electrical sockets and switches, remove the faceplate before beginning, with the power switched off at the main fuse box or consumer unit. Hang the panel so that it completely covers the electrical box, then use your fingers to locate its outline beneath the wallpaper and cut away the necessary section with a utility knife. Once the wallpaper is secured, reinstall the faceplate. It will cover the cut edges and create a neat, almost invisible finish.
The principle is similar around pipes and radiators. Mark the outline of the fitting through the wallpaper, cut from the edge towards the shape with scissors, and then carefully guide the wallpaper around the obstacle, pressing it firmly into place. If possible, remove radiators from the wall before installation. This creates a much neater finish and prevents heat from affecting the wallpaper while the adhesive is drying.
The Most Common Wallpapering Mistakes to Avoid
Knowing the most frequent mistakes in advance is the easiest way to avoid making them yourself. Anyone who has wallpapered one or more rooms will know that most installation problems are predictable and can be prevented with a little planning and attention.
Failing to Prepare the Wall Properly
This is the most common mistake of all. A wall with signs of damp, unfilled holes, peeling paint or old wallpaper that has not been removed is not a suitable base for any new wall covering. The result will nearly always be disappointing, regardless of the quality of the wallpaper applied over it.
Take the time to prepare the surface correctly. A few hours spent on preparation can translate into many years of reliable results. Wallpaper installed properly on a well-prepared wall can easily last 10-15 years without peeling, blistering or losing adhesion. The same wallpaper installed on a neglected surface may begin to show problems within only a few months.
Misaligned Seams or Noticeable Overlaps
Visible seams between panels are difficult to correct once the adhesive has dried. The main cause is usually the absence of a proper vertical guideline at the beginning of the project. Without this reference, each panel moves slightly further out of alignment, making the problem increasingly noticeable as you work towards the centre of the wall.
Always draw a plumb guideline before starting and check the vertical alignment of every new panel before pressing it firmly into the adhesive. A few seconds spent checking the position can save hours of frustration later.
Using Too Much or Too Little Adhesive
An adhesive layer that is too thin can cause the edges to lift within days or weeks, especially around corners and in areas exposed to temperature changes. Too much adhesive, on the other hand, will squeeze out around the edges. If it is not immediately removed with a damp sponge, it may leave visible marks or yellow staining on the surface of the wallpaper.
The correct amount allows the panel to bond securely without large quantities of adhesive escaping from the edges. With a little practice, it becomes easier to recognise the right consistency and judge when the surface has been covered evenly.
How to Care for Wallpaper Over Time
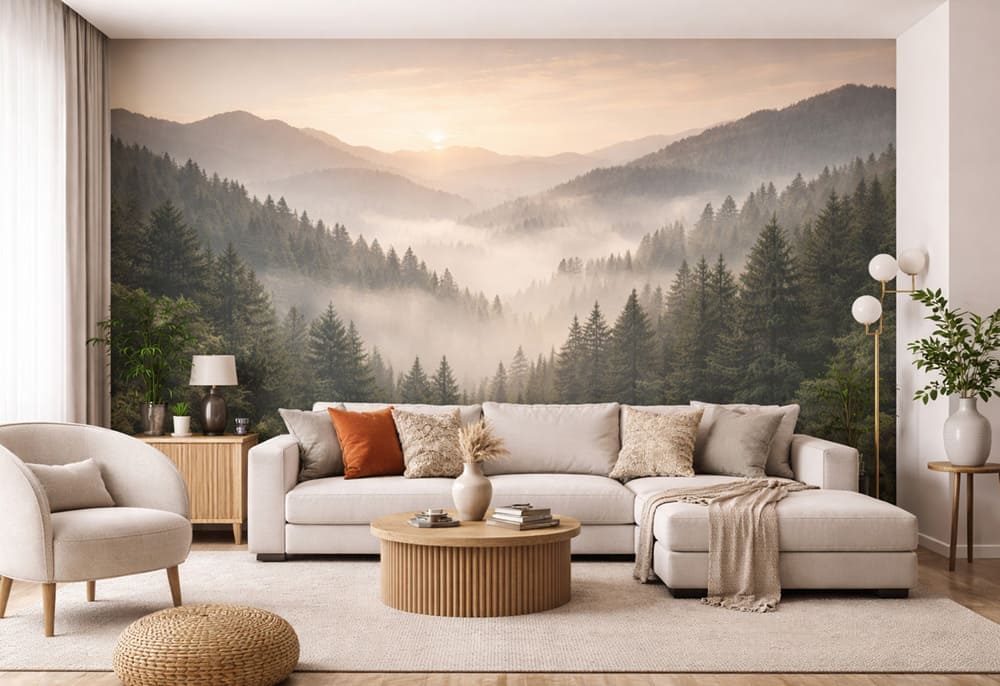
Once the installation is complete, wallpaper needs very little maintenance to keep it looking its best. Everyday care comes down to a few simple precautions that protect your investment and preserve the appearance of the wall covering.
Avoid washing a newly wallpapered wall during the first two weeks after installation. This gives the adhesive enough time to dry and stabilise completely. After that period, most modern wallpapers, particularly vinyl products and photo wallpapers printed on synthetic substrates, can be cleaned with a damp cloth and warm water using gentle movements without excessive pressure.
For more stubborn marks, a mild detergent diluted in water works well on most washable surfaces. Avoid abrasive cleaning products, solvents and rough-sided sponges, as these can damage the print or the wallpaper's surface finish.
Direct sunlight will gradually fade any wall covering. In rooms with strong sun exposure, curtains or blinds that filter the light during the brightest hours will help protect both the furniture and the walls from premature fading.
If a corner or edge begins to lift, deal with it promptly by applying a small amount of wallpaper adhesive with a toothpick or fine syringe. Waiting allows dust to settle between the wallpaper and the wall, making the repair more difficult and less tidy.
Choosing quality materials from the outset is the best way to minimise maintenance over time. Our 3D photo wallpapers are produced using solvent-free, water-based inks and carefully selected substrates chosen for their durability and ease of cleaning, combining striking visual impact with everyday practicality.
Whether you are updating your living room, bedroom, choosing wallpaper for behind the TV, or looking for inspiration for children's room wallpaper, our catalogue includes made-to-measure wall murals for every room and interior style.
Frequently Asked Questions About Hanging Wallpaper
Can You Hang New Wallpaper Over Existing Wallpaper?
It is not recommended. The moisture in the new adhesive can soften or cause the existing wallpaper to swell, creating uneven areas that become visible through the new covering. The best approach is always to remove the old layer with a suitable wallpaper stripping solution, which is readily available from hardware shops, then sand and prepare the surface properly before installing the new wallpaper. Hanging wallpaper over an existing layer not only affects the appearance but also significantly reduces the durability of the new installation.
How Long Should Wallpaper Dry Before It Can Be Touched?
Wallpaper generally takes 24-48 hours to dry completely, depending on the type of adhesive, the porosity of the wall and environmental conditions such as room temperature and relative humidity. During this period, avoid strong draughts and intense heating, which can make the adhesive dry unevenly and cause shrinkage or bubbles. The first 6-8 hours are the most critical: do not touch the wallpaper, wet the walls or open the windows during this time.
What Should You Do If Air Bubbles Remain After Drying?
Small bubbles that appear immediately after installation will usually disappear during the first 48 hours of drying and do not require any action. Bubbles that remain after 48 hours indicate an area with poor adhesion. You can repair them using a wallpaper syringe filled with diluted wallpaper adhesive, injecting it through a tiny pinhole made in the centre of the bubble. Gently press the wallpaper back into place with a small roller or your fingers, then wipe away any excess adhesive with a damp cloth.
Can You Hang Wallpaper in a Bathroom or Kitchen?
Yes, provided you choose a material specifically designed for humid environments. Vinyl and non-woven wallpapers offer good resistance to moisture, steam and the temperature changes commonly found in bathrooms and kitchens. Traditional paper wallpaper is best avoided in these rooms because it tends to soften and peel more quickly when exposed to steam. In areas that come into direct contact with water, such as around a shower, or behind a hob where the wall is exposed to heat and splashes, use tiles or another purpose-made waterproof wall covering instead.
What Is the Difference Between Traditional Wallpaper and Custom Photo Wallpaper?
Traditional wallpaper is produced in standard rolls with designs that repeat at regular intervals. It requires an accurate calculation of the number of rolls, careful cutting and precise pattern matching during installation. Custom photo wallpaper is printed to the exact dimensions of your wall and supplied as numbered panels ready to hang, without the need to match a repeating pattern. The finished design forms one continuous image with minimal visible joins, creating a powerful visual effect and giving you the freedom to choose from a wide range of images, photographs and designs.
Can You Hang Wallpaper on Plasterboard?
Yes. It is both possible and fairly common, but untreated plasterboard requires one essential preparation step. Bare plasterboard is extremely porous and absorbs adhesive too quickly, which can compromise the bond. You should first apply a primer specifically designed for plasterboard to seal the surface and ensure even adhesion. Plasterboard that has already been finished with matt acrylic paint, however, provides an excellent base for wallpaper and does not normally require an additional primer.